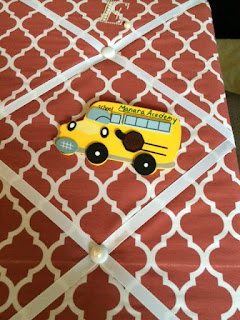
I made a trip to Hobby Lobby yesterday afternoon and I'm glad I did ... they had many things at 80% off and so I was able to buy a few things for my classroom that I will take pictures of and share later ... but one thing I can share now is MY Learning Targets / Name Board that I will place right outside my classroom.

The board was $3.60 ... I couldn't pass it up! I walked around for a while deciding what I would do with it in my classroom! I knew I would be able to do something with it .... but what?
I picked out some cute "blingy" letters that say mrs. E. and added those to the board. I also purchased some Velcro and a couple cute wooden cut-outs that I will use during the year.
I am going to post the Learning Targets on this board so that when parents or visitors are walking through the building, they will know what our class is working on. The Velcro will hold the cute little cut-outs that also go along with many of our learning targets, so that I'll be able to change them out as needed.
UP - CYCLED CENTER
I 've also been saving bottled water lids for about 7 months! I pulled out my colored Sharpie's last night and made two complete sets of Upper and Lower case letters for a matching game for one of my letter/writing centers this year. I will keep collecting lids and I would like to have 4 complete sets. I then will make some Word Family games with the lids! This is an easy and inexpensive center!
I saw this project out on Facebook and wanted to make it last Summer, but I'm glad I didn't because after thinking about it I decided to give it a little twist. At the beginning of the school year we study Numbers 1 - 10 and also 11 - 20 in Math, but we also study Texas and Texas symbols in Social Studies. So, I decided to link both together. I put ten craft sticks together and proceeded to tape them together so that they stay together. Then flip them over and add some Mod Podge.
Paint some Mod Podge across the sticks and then carefully lay the picture you would like to use onto the sticks.
Who doesn't love Mod Podge!
Once you position the picture, then gently Mod Podge over the picture so it adheres to the sticks. My first Texas Symbol - The Texas State Fish ... the Guadalupe Bass.
Then be patient and let it dry ... it took a couple of hours because it is HUMID today!
I then cut out the description of the picture which I Mod Podged to the back of the sticks ... it will be a little difficult to read once it is cut into the puzzle, but I will also have hard copies in the center, so children and I can read what the symbol is.
Finally, I added numbers and tallies ... it still is a little tacky so I'm going to let it continue drying before I cut it apart.
The final thing you need for this project is an X-acto knife ... I am going to let the puzzles dry over night before I cut them ... I feel that the humidity is making the Mod Podge take a bit longer to dry.
Here is the ARMADILLO!!!! The Texas State Mammal (small)
I think the kids will love using these and I will be able to get dual usage out of them!
Math and Social Studies!
For my 11-20 Number puzzles, I am going to use some Community Helper pictures and I am also going to use colored craft sticks and put them in color patterns!


No comments:
Post a Comment